Bacterial culture is a critical first step in plasmid preparation. The amount of plasmid DNA that you recover from your plasmid prep is highly dependent on the number of plasmid containing bacteria that you successfully process. Read on to learn about several important tips to keep in mind when growing bacterial cultures for plasmid prep.
Ensure your Bacteria Strain is Compatible for Plasmid Prep.
Not all bacteria strains are ideal for plasmid prep. Using strains with endonucleases or high recombination activity should be avoided to minimize plasmid degradation and instability. Certain strains, such as DH5α, are engineered to lack DNA endonuclease I and minimize recombination events, resulting in high yields of intact plasmid DNA. Zymo Research’s Mix & Go! Competent Cell line is available in a number of strains that are ideal for plasmid prep. Premade Mix & Go! Competent Cells enable a simple 20 second transformation process without the need for heat shock, lengthy incubations, or outgrowth procedures.
Always Inoculate your Growth Medium with a Single Colony on a Plate.
Inoculating from a single colony ensures that your starting bacterial culture is from the same genotype and contains your plasmid vector. If you are using a bacterial stock, such as a glycerol stock or bacterial stab, streak the bacteria onto a Luria Broth (LB) Agar plate containing the appropriate antibiotic and let it grow overnight at 37 °C to isolate single colonies (Figure 1).
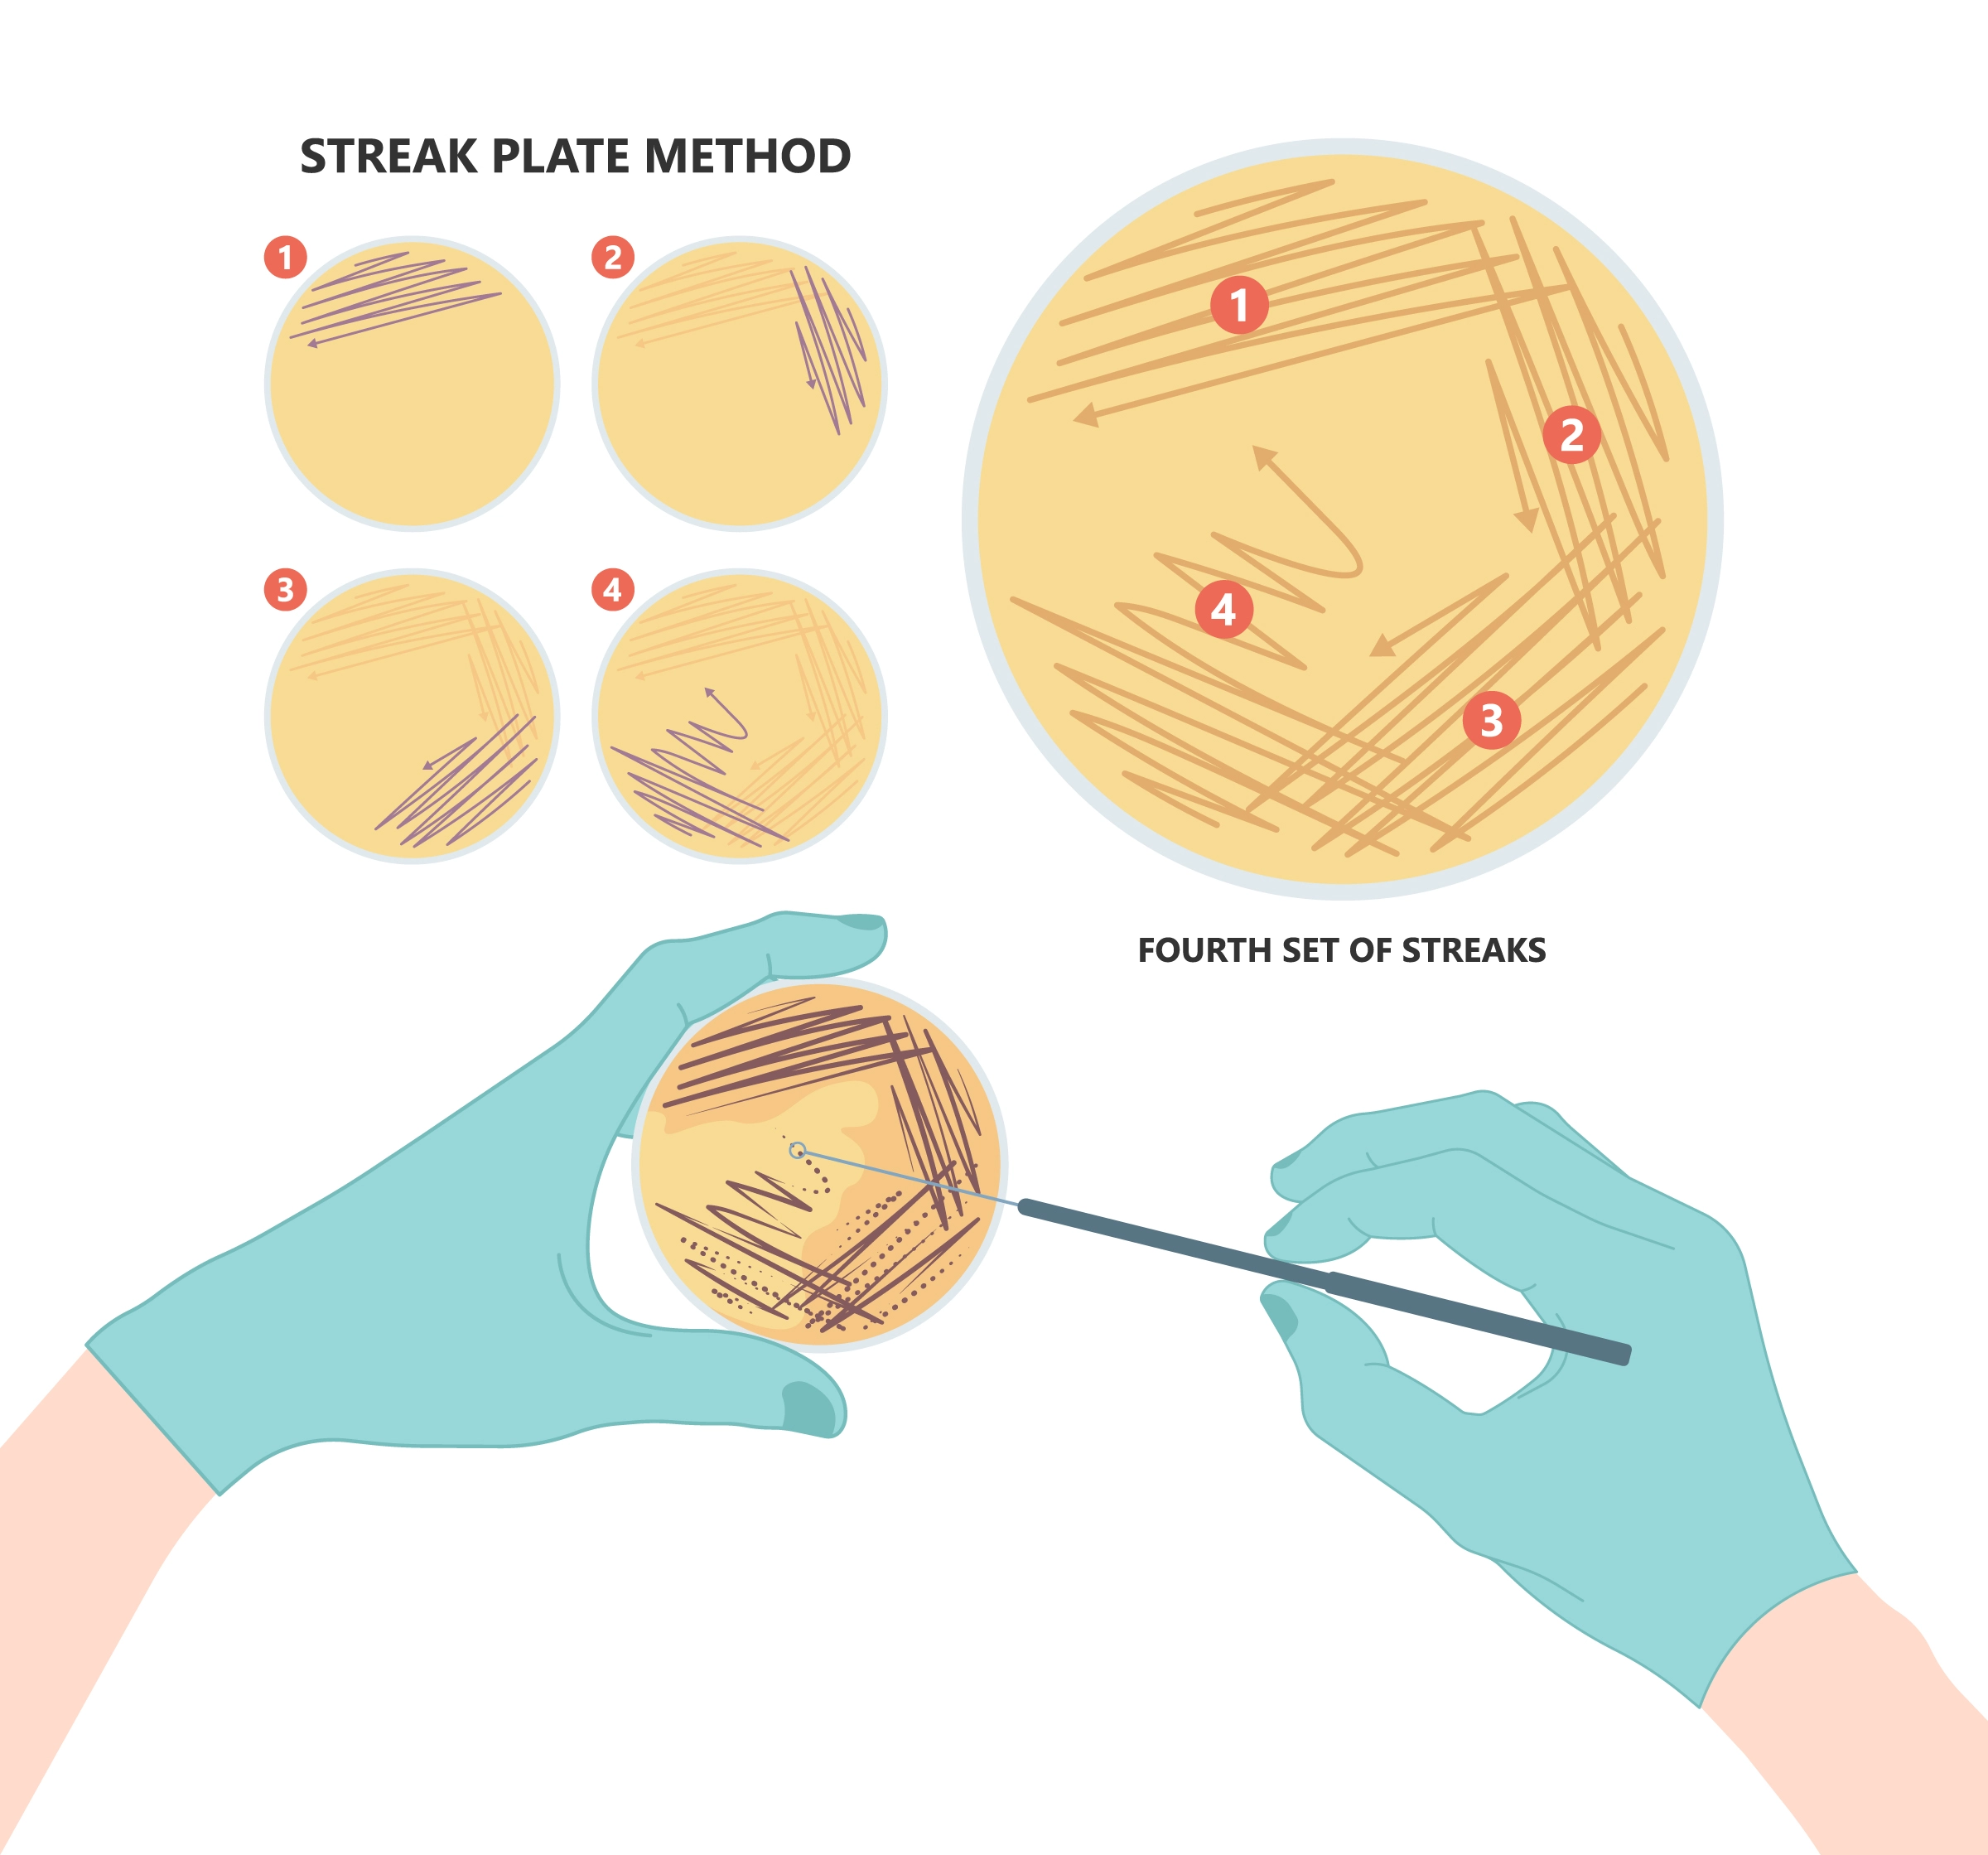
Figure 1 – Proper streaking technique to select a single bacteria colony.
First, sterilize an inoculating loop in a Bunsen Burner flame and allow it to cool slightly before gently dipping the sterile loop into the bacterial stock. Next, gently streak the inoculating loop over the first quadrant of the agar plate in a back-and-forth motion, being careful not to dig trenches in the plate. Sterilize the loop and allow it to cool. Then, overlapping with the 1st streak, gently streak the inoculating loop over the second quadrant. Sterilize the loop and allow it to cool. Finally, repeat the process for quadrants three and four.
Ensure that Enough Antibiotic is Present in the Growth Medium.
It is imperative that the correct amount of antibiotic is present in your bacterial culture (Table 1), otherwise the lack of selective pressure will cause your culture to start to dilute out the plasmid during cell division. Make sure to add the antibiotic to the growth medium immediately before inoculating to ensure the antibiotic is performing optimally before the cells start to divide.
| Antibiotic | Stock Concentration | Working Concentration for E. coli |
|---|---|---|
| Ampicillin | 100 mg/ml | 100 µg/ml |
| Carbenicillin | 100 mg/ml | 100 µg/ml |
| Chloramphenicol | 10 mg/ml | 20 µg/ml |
| Kanamycin | 35 mg/ml | 35 µg/ml |
| Tetracycline | 10 mg/ml | 10 µg/ml |
Provide the Culture with Adequate Aeration.
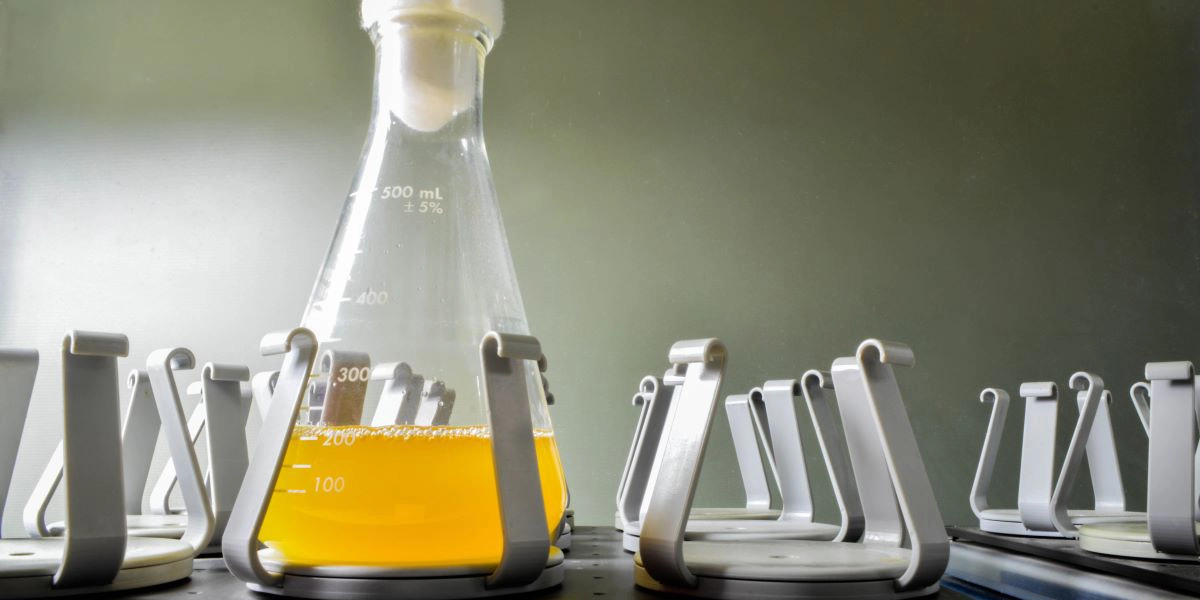
Although E. coli is a facultative anaerobic organism, the bacteria grow much faster when oxygen is present. Therefore, choosing a flask that allows for proper aeration of the bacterial culture is key for optimal growth. Ideally, a flask with a maximum volume that is at least 5 times larger than the culture volume should be used to grow E. coli (Figure 3). For the best aeration, use baffled culture flasks and a vented or gas-permeable seal on the culture vessel and shake at 200 – 300 rpm.
- X = Maximum Flask Volume
- X(0.2) = Maximum Culture Volume
- Ex. Use a 250 ml flask for 50 ml of culture.
Figure 3 - Formula for calculating optimal flask size for a specific culture volume.
Harvest Bacteria after the Bacterial Culture Reaches the Stationary Phase.
Bacterial growth in liquid culture occurs in three distinct phases, the lag phase, the log or exponential phase, and the stationary phase (Figure 4). The lag phase is a short period in which the bacteria are still acclimating to the media and are slowly beginning to divide. During the logarithmic or exponential phase, the bacteria grow exponentially. Finally, during the stationary phase, bacterial growth plateaus due to a lack of nutrients. The depletion of nutrients and accumulation of waste eventually leads to a decrease in growth as bacteria die off. Plasmid will typically still be replicating during the early part of the stationary phase. Therefore, you want to harvest the cells after about 12 – 16 hours of growth so you can maximize the amount of plasmid DNA present in your bacterial culture before the cells start to die. Measuring the OD (optical density) of your culture can help you determine if your culture has grown to an appropriate density. We recommend using overnight cultures that have reached an OD 600 of at least >2.0.
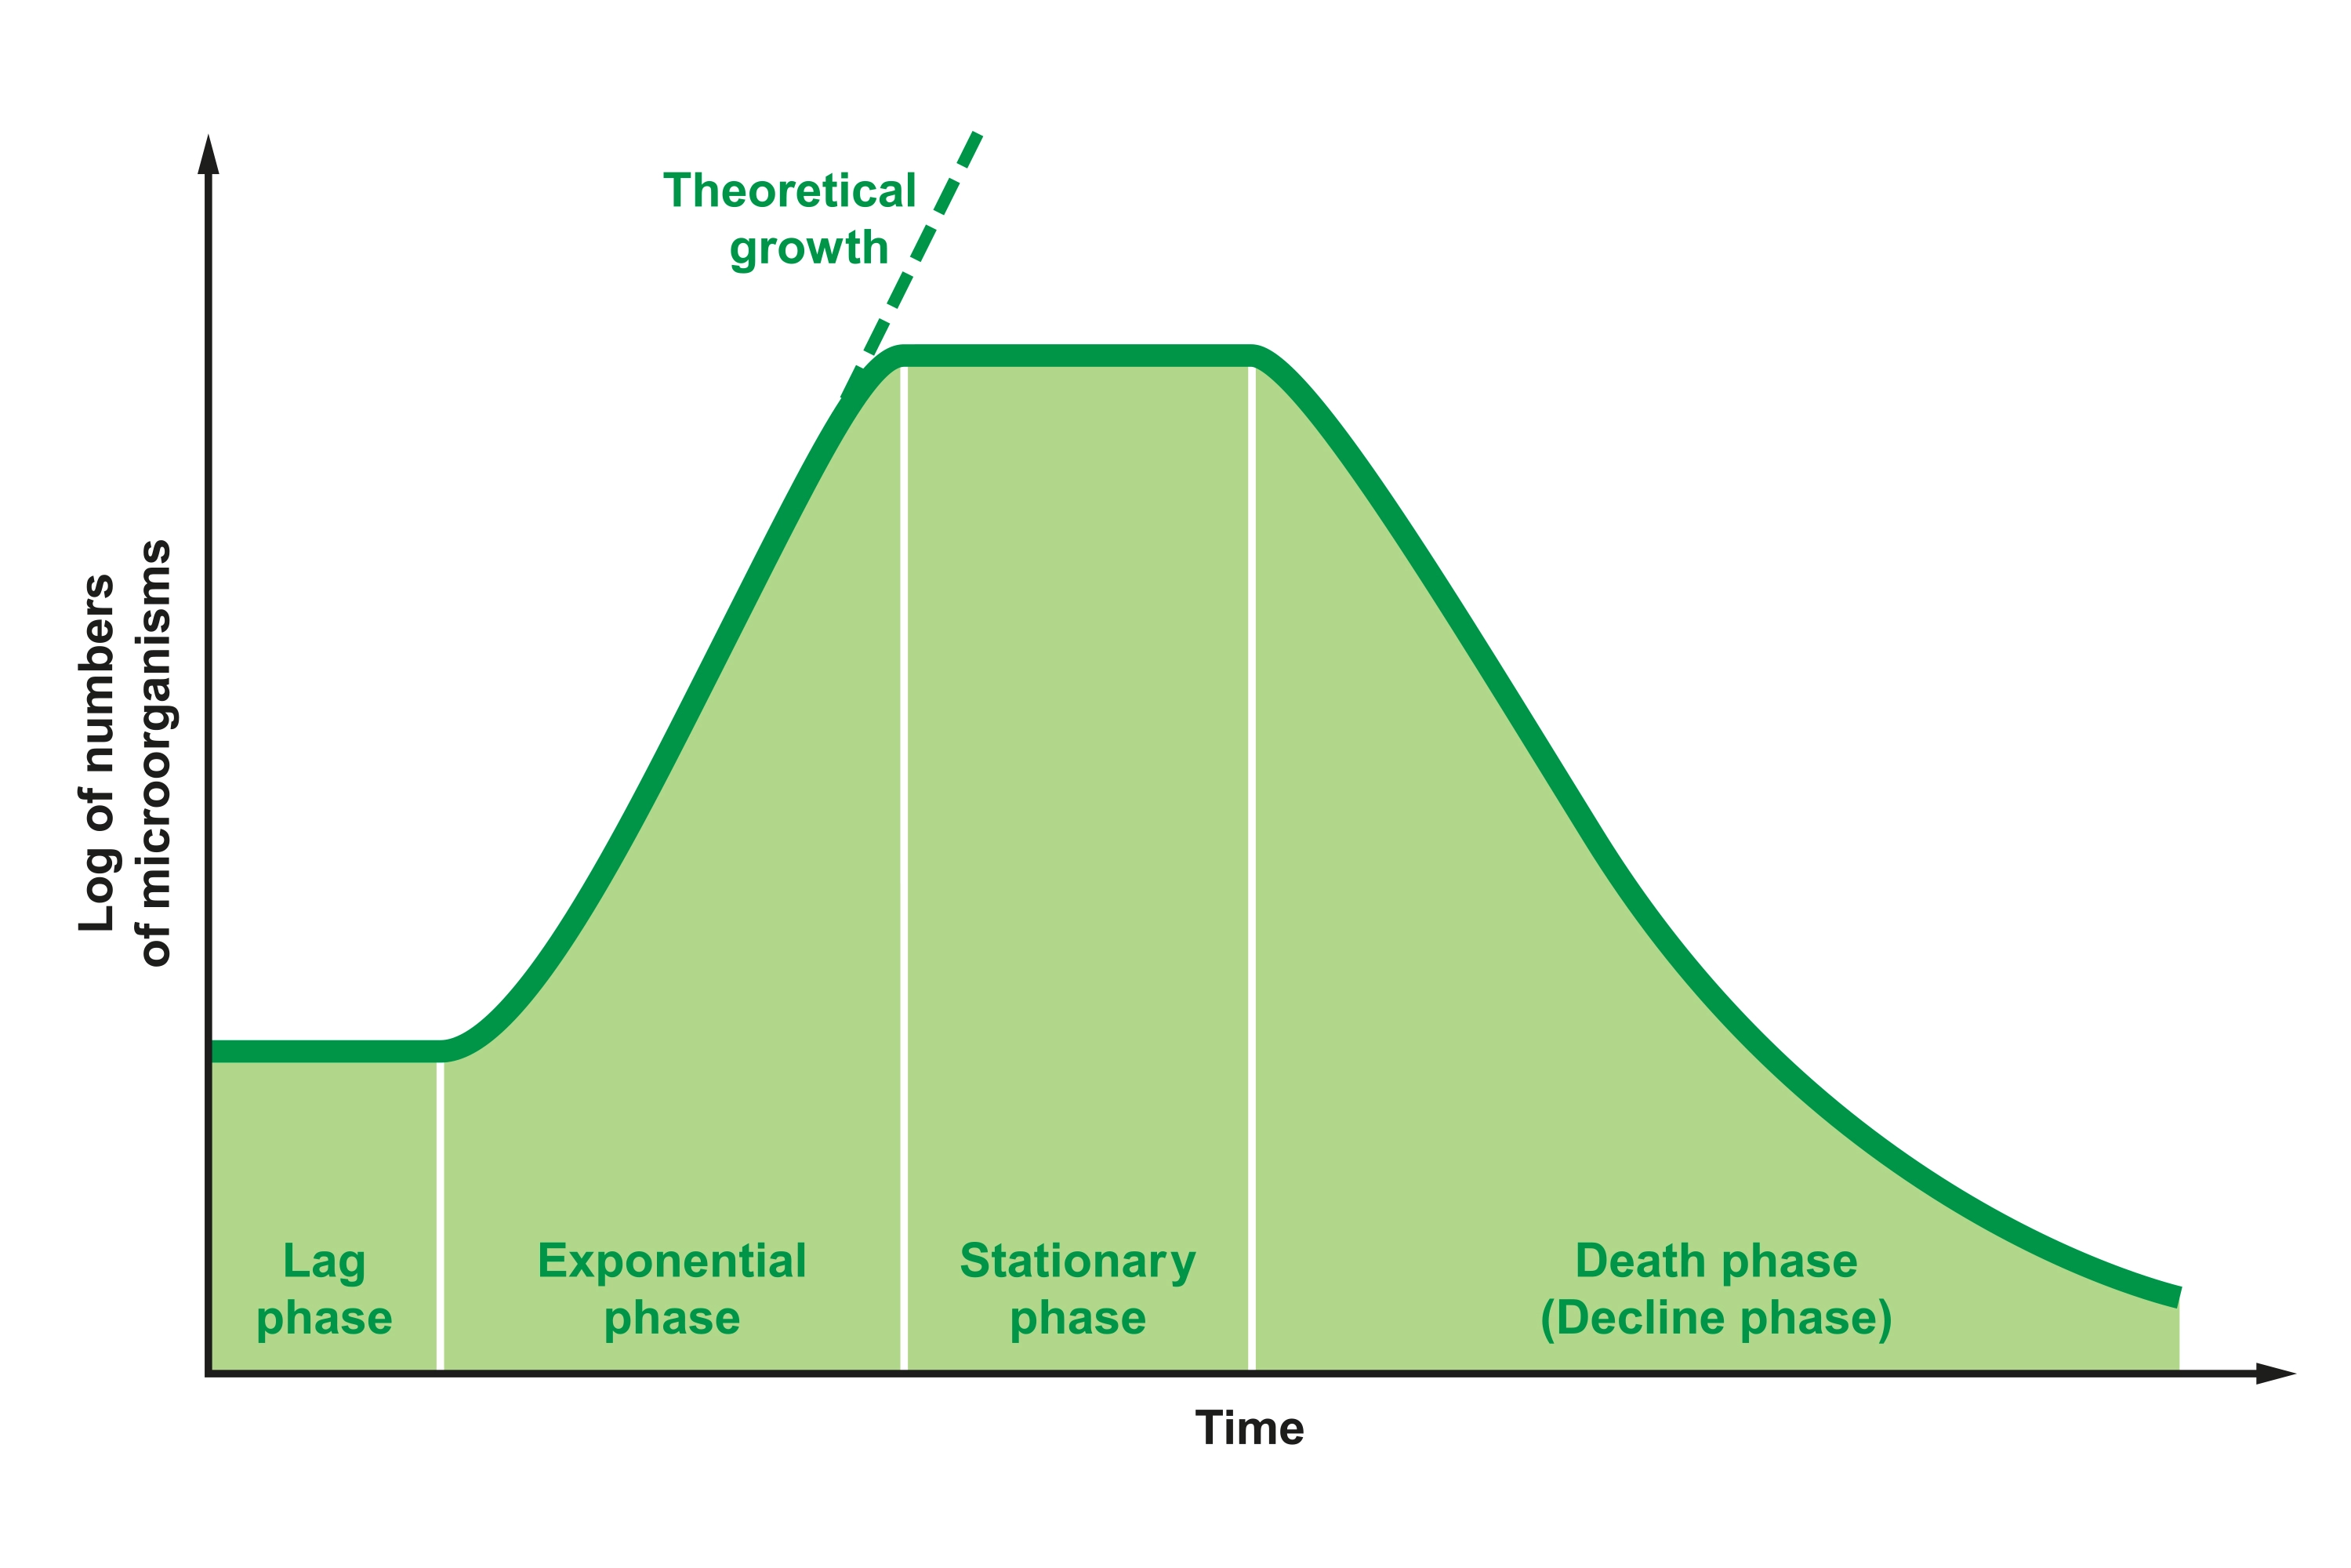
Figure 4 - Growth curve and phases of bacteria grown in liquid media.
Use a Starter Culture for Larger Overnight Cultures.
For overnight culture volumes greater than 10 ml, it’s recommended to use a starter culture for optimal growth. Starter cultures can be made by preparing 10 ml or less of LB with the appropriate antibiotic, inoculating the liquid media with a single colony, and shaking at 37°C for 8 hours. After 8 hours, prepare the larger overnight culture by diluting the starter culture from 1:500 to 1:1000, using LB media containing the appropriate antibiotic.
Choose Growth Media Wisely.
Different culture medias have different effects on bacterial growth. For example, rich media, such as Terrific Broth or 2x YT Broth have additional nutrients that promote higher levels of cell growth, which can be used to increase plasmid yield. However, it is important to consider the maximum number of cells your plasmid purification process can handle. Exceeding the protocol’s limits can result in decreased yields and the recovery of low-quality plasmid DNA. Luria Bertani (LB) Media is commonly used to grow E. Coli cultures for plasmid prep and can easily be prepared with just three ingredients (Table 2).
| Content | Per Liter |
|---|---|
| Tryptone | 10 g |
| Yeast Extract | 5 g |
| NaCl | 10 g |
Now You’re Ready to Purify Your Plasmid
You’ve carefully grown up your bacteria and are ready to extract plasmid from your bacterial culture. Ensure you recover the most concentrated, highest-purity plasmid DNA possible with our ZymoPURE™ Plasmid Purification product line. Scientists at Zymo Research have developed plasmid purification technologies with your success in mind, with a variety of plasmid DNA binding capacities to choose from and high-throughput options. Let us help you achieve plasmid purification success!